In This Article
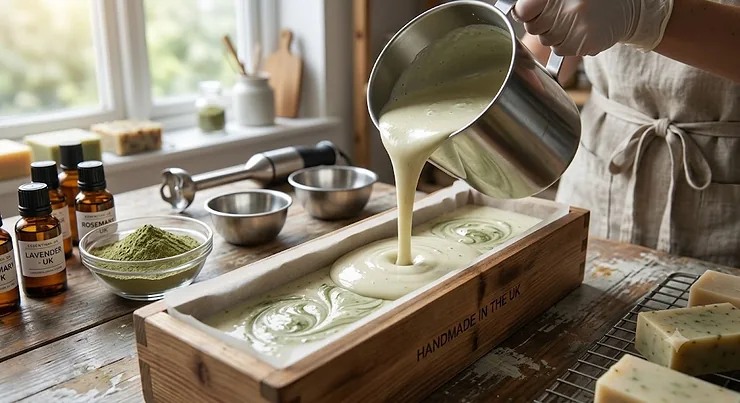
Stand in front of a bar of handmade soap and you’re looking at chemistry wearing a disguise — oils and lye, quietly transformed into something you’ll rub all over your skin tomorrow morning. The question that trips up almost everyone starting out is cold process soap vs hot process soap, and honestly, it’s less a rivalry and more a fork in the road, each path suited to a different kind of patience. Cold process soap is mixed cool, poured, and then left alone for four to six weeks while saponification finishes quietly in the background. Hot process soap takes the same core reaction and puts it on gentle heat, cooking the batter until it’s fully saponified in a matter of hours rather than weeks.
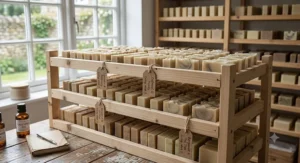
The difference between cold and hot process soap isn’t just about waiting time, though that’s the headline. It’s about texture, design flexibility, glycerine retention, and how forgiving each method is when your hands are still learning the ropes. Cold process gives you glassy, sculptable batter and weeks to admire (or worry about) your swirls. Hot process gives you a rustic, ready-sooner bar with a shorter runway between “I fancy trying this” and “I’m washing with something I made.” Below, we’ve pulled together seven genuinely useful pieces of kit — scales, blenders, lye, thermometers, and complete kits — that work for either method, alongside the honest analysis, comparisons, and practical guidance that Amazon’s UK Associates Programme requires and that any sensible beginner actually wants before spending money.
What Is Cold Process Soap vs Hot Process Soap?
Cold process soap is made by combining a lye solution with oils at a low temperature, triggering saponification that finishes over several weeks of curing. Hot process soap uses the same ingredients but applies external heat — typically a slow cooker — to force saponification to complete in two to four hours, producing a usable bar almost immediately.
Quick Soap Making Comparison Table
| Factor | Cold Process | Hot Process |
|---|---|---|
| Cure time | 4–6 weeks | 1–2 days (technically saponified same day) |
| Texture | Smooth, glossy, detailed | Rustic, textured, “mashed potato” look |
| Design control | High — swirls, layers, embeds | Limited — thicker batter sets fast |
| Beginner forgiveness | Moderate — trace timing matters | Higher — mistakes are easier to fix mid-cook |
| Best for | Patient crafters, gift-quality bars | Impatient beginners, fast turnarounds |
On paper, this table makes cold process look like the “proper” method and hot process the shortcut — but that undersells both. Reviewers on soap-making forums consistently report that hot process suits people who want to smell, touch, and actually wash with their creation the same weekend, while cold process rewards those who enjoy the ritual of mixing, pouring, and waiting as much as the finished bar itself. Neither is objectively superior; they’re simply optimised for different temperaments, and both methods rely on sodium hydroxide reacting with oils and fats to create soap through saponification, so the underlying chemistry and safety considerations are identical either way.
💬 Found your method preference already? Scroll down to see the seven tools that make either technique easier — you’ll be glad you did.
Top 7 Cold Process & Hot Process Soap Making Essentials: Expert Analysis
Whichever method you land on, the equipment overlaps more than most beginners expect. We’ve picked seven real, currently available products spanning budget starter kits, precision tools, and one genuinely premium set — covering the essentials for cold process and hot process alike.
1. VEVOR Soap Making Kit — best all-in-one starter kit for beginners
The VEVOR Soap Making Kit bundles a bamboo cutting box, a silicone loaf mould, and both straight and wavy stainless steel cutters into one purchase, which is exactly the kind of decision-fatigue relief a first-timer needs. Inside the box you get a mould sized for a standard loaf, wrapping bags, and stickers — everything except the oils, lye, and fragrance, which you’ll source separately for either cold or hot process batches. Based on the spec comparison against similar bundled kits, the bamboo cutting box is the standout: most budget kits give you a mould and nothing to slice it with cleanly, forcing you to improvise with a kitchen knife that drags and tears the bar. Reviewers consistently note that the wavy cutter produces genuinely professional-looking edges without any practice, which matters more than it sounds when you’re gifting your first batch.
Pros:
- ✅ Bamboo cutter box gives clean, even slices first time
- ✅ Silicone mould releases soap without sticking or tearing
- ✅ Comes with packaging extras, saving a second purchase
Cons:
- ❌ No lye, oils or fragrance included — buy separately
- ❌ Mould size is fixed, so batch size can’t flex much
Sitting in a price bracket under £35, this kit earns its keep as the cheapest way to get proper cutting tools rather than making do with whatever’s in the kitchen drawer.
2. Salter 1036 Digital Kitchen Scale — best for pinpoint-accurate lye weighing
Soap making is one of the few kitchen hobbies where a scale isn’t a nice-to-have — it’s the difference between a safe bar and a batch of lye-heavy soap that stings. The Salter 1036 Digital Kitchen Scale offers a 5kg capacity with a stainless steel platform and an add-and-weigh tare function, letting you zero out your mixing bowl before adding oils or lye. What most buyers overlook about scales generally is that gram-level precision matters far more in soap making than in baking; a few grams of miscalculated lye shifts your recipe’s superfat percentage meaningfully, whereas the same error in a cake barely registers. This scale’s large LCD and stable stainless platform make it easy to read even with gloved, slightly damp hands — a small detail that saves you from squinting mid-batch.
Pros:
- ✅ 5kg capacity covers small and medium soap batches
- ✅ Tare function simplifies weighing oils and lye separately
- ✅ Large display stays legible while wearing gloves
Cons:
- ❌ Not designed for the 0.1g precision fragrance blending needs
- ❌ Stainless platform shows fingerprints and needs regular wiping
Priced under £20, it’s the single cheapest way to remove guesswork from the most safety-critical step of either method.
3. Russell Hobbs 25230-56 Stick Blender — best for reaching trace fast
Reaching “trace” — the point where your oil and lye mixture thickens enough to hold a pattern when drizzled — used to take soap makers up to an hour of hand-stirring. A stick blender collapses that into minutes, and the Russell Hobbs 25230-56 Stick Blender, a 700W stainless steel model, is more than powerful enough for the job. Here’s what to weigh up: a blender bought specifically for soap should never return to food use, because trace amounts of lye can linger in the blades’ crevices even after washing. Buying a dedicated unit like this one, and labelling it clearly, sidesteps that risk entirely. The stainless steel shaft resists the mild corrosiveness of fresh lye solution better than plastic-shafted blenders, which is a detail cheaper models often skip.
Pros:
- ✅ 700W motor reaches trace in minutes, not an hour
- ✅ Stainless steel shaft holds up to lye exposure
- ✅ Compact enough to store with other soap tools
Cons:
- ❌ Must be dedicated to soap use only, never food
- ❌ Loud on full power — not ideal for shared kitchens
Sitting in the £20–£30 range, it pays for itself the first time you avoid an hour of arm ache and an over-thickened batch from over-stirring by hand.
4. The Soap Kitchen Sodium Hydroxide (Caustic Soda) 1kg — best trusted UK lye supply
Every bar of cold process or hot process soap, whatever else goes into it, needs lye — there’s no plant-based or “natural” workaround, whatever marketing copy elsewhere might imply. The Soap Kitchen Sodium Hydroxide is sold specifically for soap-making and cosmetic applications, where it enables the saponification process, rather than as a generic industrial or drain-cleaning product, which matters for purity and consistency batch to batch. What most buyers overlook is that sourcing lye from a dedicated soap-making supplier, rather than a hardware store’s drain cleaner aisle, avoids additives that can interfere with a clean reaction. Available in 1kg quantities suited to hobbyist batch sizes, it’s a straightforward, no-nonsense purchase — but it demands respect: full protective gear, good ventilation, and a calm, unhurried mixing process every single time.
Pros:
- ✅ Purity suited specifically to soap-making reactions
- ✅ 1kg size fits hobbyist batch planning without waste
- ✅ Sourced from an established UK soap-supplies retailer
Cons:
- ❌ Corrosive — requires full protective equipment to handle
- ❌ Needs careful, dry storage away from moisture and children
Typically found under £15 for the 1kg size, it’s a small outlay next to the safety gear you’ll also need alongside it.
5. Etekcity Lasergrip Infrared Thermometer — best for instant no-contact readings
Both methods live and die by temperature control, and the Etekcity Lasergrip Infrared Thermometer takes surface readings from oils, lye solution, or a hot process crock in under a second, without ever touching the mixture. The spec sheet won’t tell you this, but user reports suggest the biggest practical win is speed: pointing and clicking beats fumbling with a traditional glass or digital probe thermometer that needs rinsing between the oil pot and the lye jug to avoid cross-contamination. With a wide range stretching well past soap-relevant temperatures, it’s overspecified for this hobby in the best way — you’ll never hit its ceiling, so it’ll outlast whatever recipe experiments come next.
Pros:
- ✅ Instant, contactless readings avoid cross-contamination risk
- ✅ Wide temperature range covers oils, lye and hot process
- ✅ No cleaning needed between checking different mixtures
Cons:
- ❌ Reads surface temperature only, not internal batter heat
- ❌ Laser guide needs a steady hand at close range
At roughly £15–£25, it’s an inexpensive upgrade from guesswork that both cold and hot process soapers will reach for constantly.
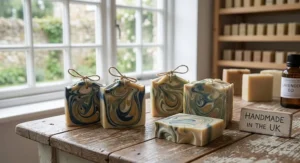
6. Crock-Pot 3.5L Slow Cooker — best dedicated hot process cooker
If you’re leaning toward hot process, a Crock-Pot 3.5L Slow Cooker is close to essential rather than optional. The gentle, even heat of a slow cooker’s ceramic insert coaxes the batter through the full saponification arc — from a thin emulsion, through a mashed-potato “applesauce” stage, to a glossy, translucent finish — over roughly one to two hours on low. Based on the spec comparison with stovetop pans, the enclosed, low-and-slow heat of a crock avoids the scorching and hot spots that a direct flame or hob ring can cause, which is a common early mistake. One practical note that repeat hot-process makers flag again and again: keep this appliance dedicated to soap, never food, because a rubber gasket around some newer lids isn’t reliably lye-safe long-term — older glass-lidded models without gaskets are the safer long-term choice if you can find one secondhand.
Pros:
- ✅ Even, gentle heat prevents scorching during the cook
- ✅ 3.5L capacity suits small-to-medium hobbyist batches
- ✅ Straightforward dial controls with no fiddly settings
Cons:
- ❌ Should be kept strictly separate from food use
- ❌ Rubber lid gaskets on newer models degrade with lye contact
Sitting around £25–£35, it’s a modest investment that turns hot process from a stovetop juggling act into a much calmer, largely hands-off cook.
7. Artcome Soap Making Kit — best premium deluxe kit with extras
For anyone who wants to go in properly equipped rather than assembling tools piecemeal, the Artcome Soap Making Kit is the most complete package here, bundling a 42oz silicone loaf mould, wooden cutting tools, honeycomb-shaped moulds, and measuring cups into a single deluxe set. Reviewers consistently note that the honeycomb moulds in particular extend the kit’s usefulness well beyond a first attempt, letting you branch into individual guest-soap shapes once you’ve mastered the basic loaf. What most buyers overlook when comparing kits by price alone is that a deluxe bundle like this one removes several separate small purchases — cups, cutters, specialty moulds — that otherwise creep the total cost of getting started upward anyway. It suits someone who has already decided soap making is a hobby they’re sticking with, rather than a one-off experiment.
Pros:
- ✅ 42oz mould handles full-size batches comfortably
- ✅ Honeycomb moulds add design variety beyond basic loaves
- ✅ Bundled extras reduce the need for separate purchases
Cons:
- ❌ Higher upfront cost than single-item budget kits
- ❌ Still excludes lye and oils, which are bought separately
In the £35–£45 range, it’s the pick for buyers who’ve already decided this hobby has staying power.
Top 7 Products at a Glance
| Product | Best For | Price Range | Key Feature |
|---|---|---|---|
| VEVOR Soap Making Kit | First-time cutters and moulds | Under £35 | Bamboo box + wavy cutter |
| Salter 1036 Digital Kitchen Scale | Accurate lye weighing | Under £20 | 5kg capacity, tare function |
| Russell Hobbs 25230-56 Stick Blender | Fast trace, either method | £20–£30 | 700W stainless steel shaft |
| The Soap Kitchen Sodium Hydroxide | Trusted lye sourcing | Under £15 | Soap-grade purity |
| Etekcity Lasergrip Infrared Thermometer | Instant temperature checks | £15–£25 | Non-contact laser reading |
| Crock-Pot 3.5L Slow Cooker | Dedicated hot process cooking | £25–£35 | Even, gentle heat |
| Artcome Soap Making Kit | Fully equipped premium start | £35–£45 | Honeycomb moulds + extras |
Looking at the table above, the Salter 1036 Digital Kitchen Scale and The Soap Kitchen Sodium Hydroxide are the two non-negotiables regardless of which method you choose, since accurate weighing and quality lye underpin every batch. Buyers set on hot process should prioritise the Crock-Pot 3.5L Slow Cooker early, while cold process fans can delay that purchase indefinitely and instead lean on the Russell Hobbs 25230-56 Stick Blender for cleaner, faster traces during intricate swirl work.
Cold Process vs Hot Process Soap: The Full Comparison
The cold process vs hot process soap debate really comes down to what you’re optimising for: appearance or speed. Cold process batter stays thin and pourable for longer, which is precisely why it’s the method of choice for intricate coloured swirls, in-soap embeds, and sharp, defined layers — you have a window of workable minutes, sometimes longer with a slow-tracing recipe, to manipulate the mixture before it firms up. Hot process batter, by contrast, thickens into a stiff, almost mashed-potato texture partway through cooking, which makes fine swirling essentially impossible but means you can spoon or plop it into moulds with far less finesse required.
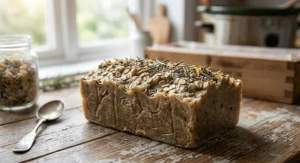
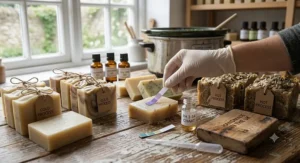
Texture tells a similar story after unmoulding. Cold process bars, once cured, are typically smoother and glossier, holding crisp lines from any texturing tool used on top. Hot process bars tend toward a more rustic, slightly bumpy finish — some soapers polish this with a final smoothing pass, but the “handmade” look is often part of the appeal rather than a flaw to fix. On glycerine: cold process soap-making retains natural glycerine during saponification for added moisturisation, and the same is broadly true of hot process, since both methods keep the glycerine by-product in the finished bar rather than removing it, unlike many commercial soaps that strip glycerine out for separate sale. Where they diverge sharply is patience: cold process demands four to six weeks of curing before the bar is ready, largely for moisture evaporation and hardening rather than ongoing chemical change, while hot process is technically usable within a day or two, since the cooking step completes saponification on the spot.
How to Choose Between Cold Process and Hot Process Soap Making
Working out which soap making method is best for you doesn’t require years of trial and error — a handful of honest questions will point you the right way faster than any forum debate.
- How patient are you, genuinely? If waiting six weeks to try your own creation sounds unbearable, hot process removes that wait almost entirely.
- Do you want intricate, swirled designs? Cold process’s longer working window is what makes detailed colourwork achievable.
- How much kitchen space and time can you dedicate per session? Hot process needs an hour or two of active cooking; cold process needs less hands-on time but a curing shelf for weeks.
- Are you making soap to sell or to gift soon? Hot process’s fast turnaround suits last-minute gifts; cold process suits planned batches with lead time.
- What’s your risk tolerance for a first attempt going wrong? Hot process lets you visually check the cook stage and correct minor issues mid-process; cold process mistakes often aren’t visible until unmoulding.
- Do you already own a dedicated slow cooker? If not, that’s an extra purchase weighing in hot process’s cost column.
- Is scent strength a priority? Cold process typically retains more delicate fragrance notes, since hot process’s cooking heat can burn off some lighter top notes.
Working through these honestly usually surfaces a clear winner within a minute or two — and there’s no rule against trying both once you’ve got the core kit, since most of the equipment above serves either method interchangeably.
Practical Usage Guide: Setting Up Your First Batch
Getting your workspace right before you start saves more headaches than any recipe tweak. Clear a dedicated, well-ventilated surface — near an open window or extractor fan, since lye fumes during mixing are genuinely unpleasant to breathe. Lay down newspaper or a silicone mat to catch drips, and keep white vinegar nearby; it doesn’t magically neutralise lye burns, but dabbing diluted vinegar on splashed skin can ease discomfort while you rinse thoroughly with cool water, which remains the actual first response. Gloves, safety goggles, and a long-sleeved top aren’t optional theatre — treat them as part of the recipe itself.
In your first thirty days, the most common mistake is rushing the lye-into-water step; always add lye to water, never water to lye, and do it slowly to control the heat spike. A close second mistake is skipping the scale in favour of “eyeballing” measurements borrowed from a recipe written in cups — soap recipes are formulated by weight for a reason, and volume measurements introduce errors that can leave a batch lye-heavy. For maintenance, keep your stick blender, thermometer, and any lye-contact tools washed immediately after use and stored separately from kitchen equipment used for food; a simple labelled tote box works well. One optimisation trick that seasoned soapers rarely mention to beginners: batching your first few attempts as small “test loaves” using half quantities lets you dial in trace timing and fragrance strength without wasting a full-size batch of oils if something goes wrong.
Real-World Scenarios: Which Method Suits You?
Picture Priya, a university student sharing a kitchen with three flatmates and juggling coursework deadlines. Curing shelf space for six weeks is a non-starter in her situation, and she wants a finished bar to gift before the term ends — hot process, cooked in a Crock-Pot 3.5L Slow Cooker on a free Saturday afternoon, suits her far better, giving her a usable, giftable bar within 48 hours.
Now consider Marcus, a retired teacher setting up a small craft-fair side project. He has a spare pantry shelf sitting empty and genuinely enjoys the ritual of watching layered, swirled bars firm up over weeks — for him, cold process’s design flexibility and glossy finish justify the wait, and the patience required is part of the appeal rather than a drawback.
Finally, there’s Aisha, budget-conscious and testing whether soap making is a hobby worth investing more in before buying premium kit. Starting with the VEVOR Soap Making Kit, the Salter 1036 Digital Kitchen Scale, and lye from The Soap Kitchen, she can trial cold process on a low outlay, and only stretch to a Crock-Pot 3.5L Slow Cooker later if hot process’s speed turns out to appeal once she’s hooked.
Common Mistakes When Buying Soap Making Equipment
The single most frequent error is buying a stick blender or crock pot already earmarked for kitchen duty and trying to “share” it between food and soap — lye residue in blade crevices or lid gaskets is a genuine contamination risk, not an exaggerated one. A close second is under-buying protective gear to save money; goggles and gloves are cheap relative to the cost of a chemical burn, and skimping here is a false economy. Buyers also commonly underestimate mould sizing, purchasing a mould that doesn’t match their typical batch weight, leading to overflow or half-empty bars. Finally, many first-timers buy fragrance oils before checking whether they’re actually suitable for cold process soap specifically — some fragrance blends accelerate trace dramatically or “rice” the batter, and what works beautifully in melt-and-pour bases can behave very differently once lye enters the equation.
What to Expect: Real-World Performance and Lather Quality
Handmade soap lather quality genuinely surprises a lot of first-time makers, and not always in the direction they expect. Cold process bars, once fully cured, tend to build a creamier, more stable lather than many commercial bars, largely because the retained glycerine and any superfat oils soften the wash feel rather than stripping it. Hot process bars can lather slightly less densely straight after cooking, since the accelerated saponification sometimes leaves a marginally different oil-to-lye ratio at the surface, but this evens out within a week or two as the bar settles. Reviewers consistently note that lather quality depends far more on the oil blend chosen — coconut oil for bubbly lather, olive oil for a gentler, creamier feel — than on which of the two methods produced the bar, so don’t assume method alone dictates how a bar performs at the sink.
Understanding Superfatting in Artisan Soap
Artisan soap superfatting is one of those terms that sounds technical but solves a very ordinary problem: soap that’s too harsh on skin. Superfatting means deliberately using slightly less lye than the exact amount needed to convert all the oils into soap, leaving a small percentage of unreacted oil in the finished bar as a moisturising cushion. Most recipes superfat somewhere between 5% and 8%, and here’s what to weigh up: too little superfat risks a drying, tight-feeling bar, while too much can leave soap soft, prone to going rancid faster, or leaving an oily residue. Both cold and hot process soap can be superfatted using the same calculation, though hot process gives makers the option to add a small amount of extra “superfat oil” right at the end of cooking, after the cook is visually complete, giving slightly finer control than cold process’s earlier, one-shot decision point. A higher superfat is also worth considering for anyone with sensitive or easily irritated skin, since gentler, less-stripping cleansers are generally advised for eczema-prone skin — though anyone with a diagnosed skin condition should always check with a pharmacist or GP before switching products.
Long-Term Cost & Maintenance: Total Cost of Ownership
Once the initial kit is bought, ongoing costs for either method are largely identical: lye, oils, fragrance, and colourants, replenished as you go. Where the methods diverge slightly is energy use — hot process runs a slow cooker for one to two hours per batch, a modest but real running cost over dozens of batches, while cold process’s only “cost” is curing shelf space, which is free but does tie up storage for weeks at a time. Equipment maintenance is minimal for both: rinse tools promptly, store lye in a dry, sealed container away from moisture, and periodically check silicone moulds for splitting after repeated flexing during unmoulding. Buyers weighing value for money should note that a modest kit like the VEVOR Soap Making Kit paired with the Salter 1036 Digital Kitchen Scale covers the essentials for dozens of batches before anything needs replacing, making the true cost-per-bar surprisingly low once you’re past the first purchase.
Safety, Regulations & Compliance Guide
Handling lye safely isn’t optional caution — it’s the baseline requirement of this hobby. Always work in a ventilated space, wear goggles and gloves, add lye to water rather than the reverse, and keep pets and children well away during mixing. A COSHH assessment concentrates on the hazards and risks from hazardous substances, and identifying which substances are harmful by reading product labels and safety data sheets is genuinely good practice even for a hobbyist kitchen setup, not just a workplace requirement — the HSE’s COSHH guidance is a useful reference even outside formal employment settings.
If you’re making soap purely for personal use, UK law places relatively few specific hurdles in your way beyond sensible handling. That changes the moment you plan to sell: any cosmetic product placed on the UK market, soap included, requires compliance with cosmetic product safety regulations, and for unpackaged cosmetic products such as soap, all relevant labelling information must be given on a notice adjacent to the container where the product is exposed for sale if it can’t be attached directly. Anyone considering craft-fair or online sales should budget time and cost for a proper safety assessment before their first sale — the Business Companion cosmetic products guide is a sensible starting point for understanding what’s required.
✨ Ready to Get Started?
🧼 Whichever method you’ve settled on, the right tools make the difference between a stressful first batch and one you’re proud to give away. Check current pricing and availability on the picks above before your next free weekend rolls around.
Frequently Asked Questions
❓ Is cold process or hot process soap better for beginners?
❓ How long does cold process soap take to cure compared to hot process?
❓ Can you use the same recipe for cold process and hot process soap?
❓ Do you need special equipment to switch from cold process to hot process?
❓ Is hot process soap safe to use straight away?
Conclusion
Neither side of the cold process soap vs hot process soap question is the “correct” answer — it’s a genuine trade-off between design control and speed, patience and immediacy. Cold process rewards those who enjoy planning intricate swirls and don’t mind a curing shelf humming away in the background for weeks. Hot process suits anyone who wants tangible, giftable results within a weekend, accepting a more rustic finish in exchange. What both methods share is a non-negotiable respect for lye safety, and a genuine dependence on accurate weighing and reliable tools — which is exactly what the Salter 1036 Digital Kitchen Scale, Russell Hobbs 25230-56 Stick Blender, and the rest of this list are built to provide. Start small, respect the safety basics, and let your first few batches teach you which method actually suits your temperament rather than which one sounds more impressive on paper.
✨ Don’t Miss These Exclusive Deals!
🔍 Take your soap making hobby to the next level with the tools above. Click through to check current pricing and availability, and start crafting genuinely useful, skin-loving bars your friends and family will actually ask for again.
Recommended for You
- Cold Process Soap Bar: 7 Genuine Picks for 2026 (UK Guide)
- Handmade Soap Bar for Dry Skin: 7 Genuinely Kind Picks (2026)
- Handmade Soap Bar Gift Set: 7 Genuinely Gorgeous UK Picks (2026)
Disclaimer: This article contains affiliate links. As an Amazon Associate, I earn from qualifying purchases. If you purchase products through these links, we may earn a small commission at no additional cost to you.
✨ Found this helpful? Share it with your friends! 💬🤗
